Making Paper Terrain Models
Three Dimensional Contour Maps from Card

In this post, I'm going to outline my workflow for creating 3D paper relief models, that I use for cards and the like. I'll be using OS Terrain® 50 for the actual topography, but this technique can easily be used for other sources - as long as you can wrangle the data.
The first step is picking a geographical area. One of the most important considerations is how big an area to model. This depends on how big you're going to be printing and constructing later. As a rough guide, my finished paper model measured about 55mm x 85mm, depicting a geographical area of 1.7km x 2.9km: so roughly a 1:34k scale.
My preference is to also pick a landform with enough prominence1 to be interesting. Subjects with enough isolation1 to avoid the need to 'clip' the contours often work better too. i.e if you wanted to model a really long ridge, unless you've got the space to show its entirety there'll become a point where you have to 'clip' it, creating a hard edge. Depending on how true you want your reproduction to be, you can always remove features etc. to optimise for these qualities.
In this example, I'll use Ysgyryd Fawr, the eastern bookend of the Black Mountains. It's an outlier which makes it work quite well.
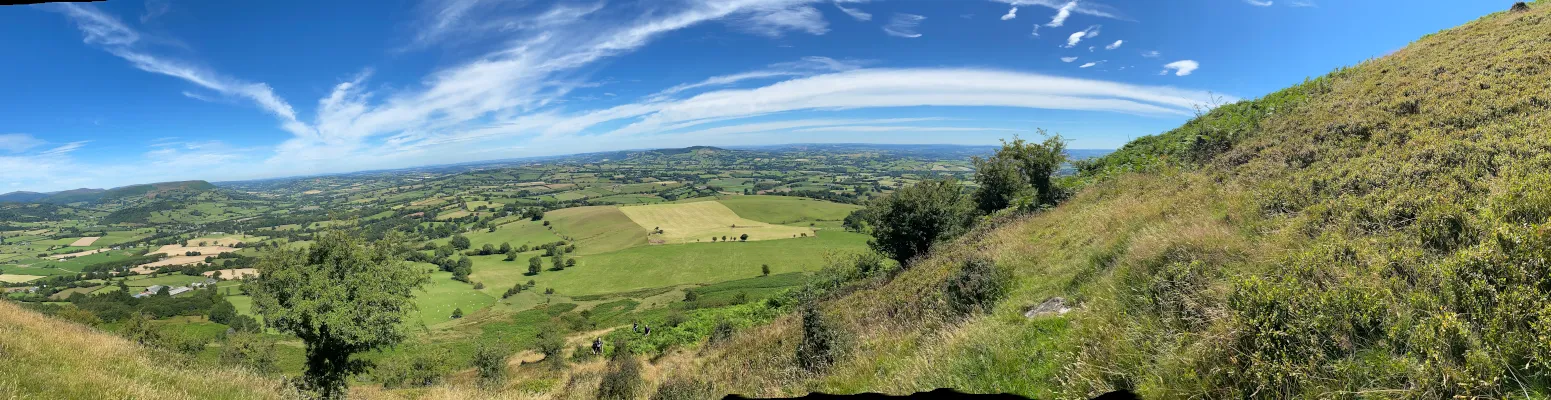
The final thing to say about selecting a good location, is that often the character of the landscape is only fully apparent when looking at the contour lines, so it might be easier to think of some candidates, and settle once you've seen the data - which is what we'll get onto next.
Ingredients
For this, we're going to need the following
-
Illustrator / Inkscape / any vector package
-
Printer
-
A4 Paper
-
A4 Card (the thicker, the better)
-
PVA
-
Scalpel
Sources
The data acquisition that we're going to go into now is quite specific so just skip over this until we're in the same position if you're using other data.
First, download the terrain data as GML (contours). The OS data is compressed and grouped by hectads2. To find the correct file, you can either use the FSC plugin for QGIS, or this convenient tool.
The filename will be in the format
LL##_OST50CONT_YYYYMMDD.zip, whereLLrepresents 2 letters, and the 2#s are each the first digit of theeastingsandnorthings.To check, the point
54.750647 , -2.1293989, is contained within the fileNY93_OST50CONT_YYYYMMDD.zipas its grid reference isNY 91769 39529.
Either way, extract the corresponding file and proceed. If the area you want to use spans multiple files, extract them both and we'll combine them shortly.
Processing
Create a new project in QGIS, it'll make life much easier if you also add a base map to orientate yourself. Layer -> Add Layer -> Add XYZ Layer…; OSM is always a good choice.
Now open the .gml files you've extracted. When QGIS prompts you to Select Vector Layers to Add..., for each file just select the ContourLine, we don't need spot heights. Zoom to the correct area, and you should be able to see the contours overlaid on the basemap.
image showing contour lines on basemap
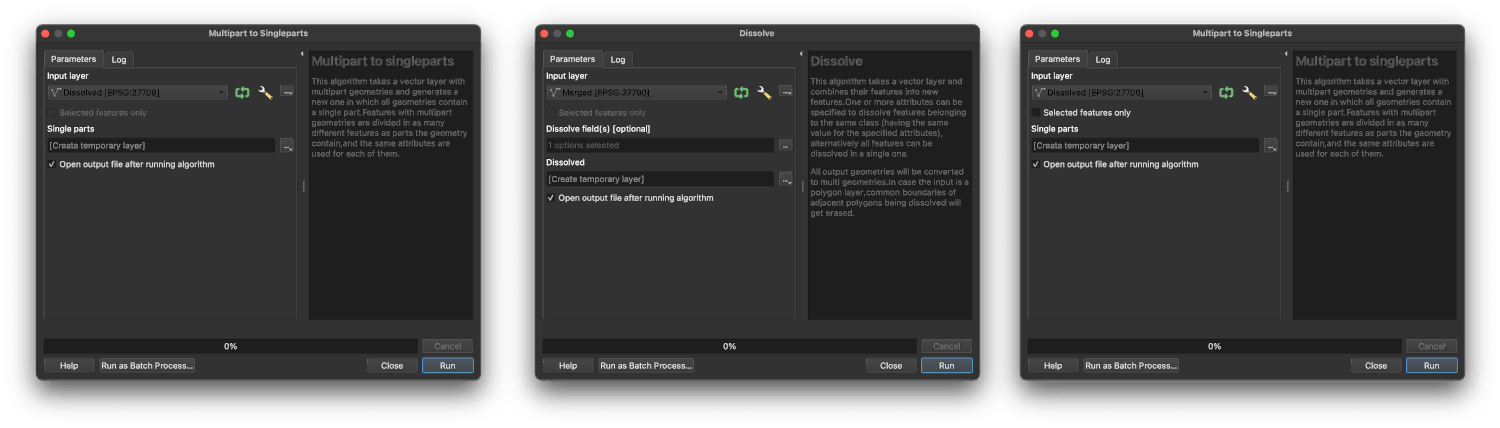
Now we have the data in QGIS, but if you start selecting things, data that spans multiple files is disconnected. We can fix that by running
Merge Vector LayersDissolve(usingpropertyValueas the field)Multipart to Singleparts
These tools can be found in the Processing Toolbox. Now we should be able to select individual contours.
Now we need to decide the contours we're going to use. The more layers, the more Z the structure will have, but bear in mind that it'll also grow in the X, Y directions too. This is where the prominence comes in. You'll have to experiment.
Once you've decided on your contours, select them, run Extract Selected Features, and then export the new layer as a .dxf with no symbology.
Layout
Now we've finished with QGIS and can move into Illustrator or any other vector software. Import the .dxf file. The scale isn't very important as you're most likely going to resize the contours to your desired real world size.
As we're going to be cutting the contours out of card, it's helpful to explode or denest the individual isolines, so we can cut them out separately. There are plenty of packing algorithms to do this optimally, but considering paper sizes are fixed, it's probably not worth the hassle unless you're dealing with enough contours to need lots of sheets.
Numbering is also helpful as once they've been cut out, the smaller pieces are often indistinguishable.
Constructing
Most printers can't handle thick card. You'll get away with 150gsm, but the 300gsm Canford card I used for this isn't going to work on a consumer feed-through printer. Instead, print on normal A4 paper, and then use masking tape to fix the template atop the card and cut.
⚠️ When picking the card to use, make sure it isn't 'coated', as the edge is going to be very prominent.
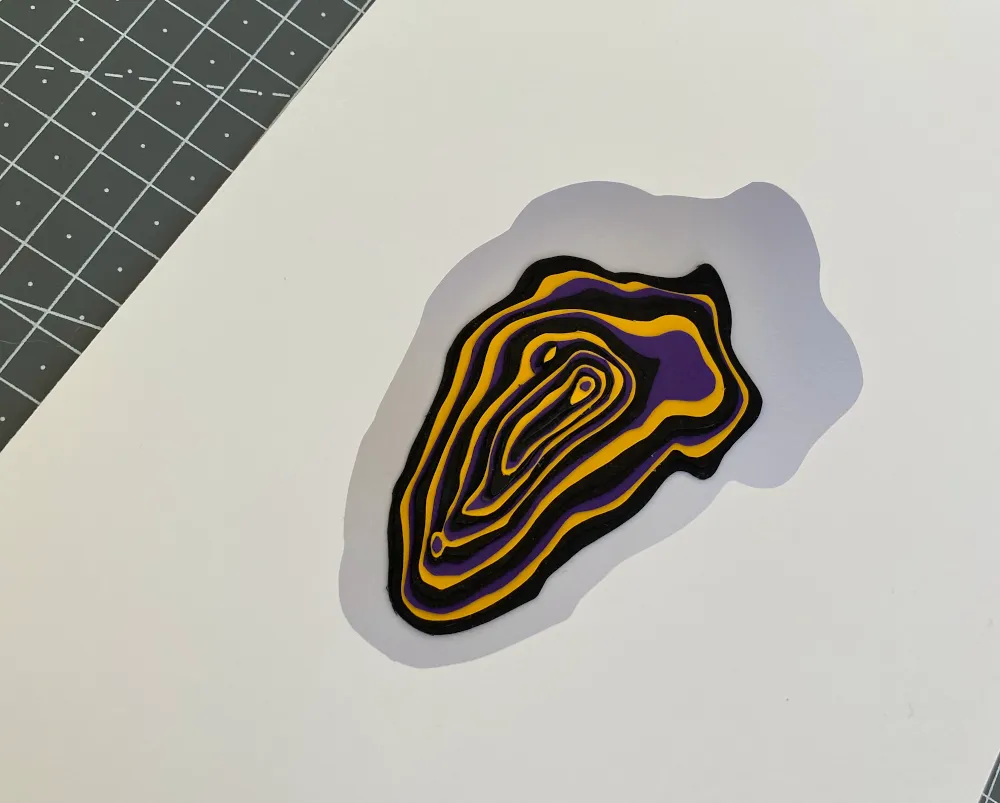
Lightly glue, compressing using something heavy between layers, and that's it!
